Channel Configuration
One of the first things that you must do when using Chameleon is to configure the channels that you need to use. Each channel within Chameleon will be connected to a DMX Universe.
You must be in Record Mode to configure channels.
There are still a number of additional things ToDo with Channel Configuration, but I am as yet unsure of the priority.
Open the Channel Configuration panel
To configure the channels the first thing you must do is open the Channel Configuration panel. You do this by selecting Channel Configuration from the Window menu. The Channel Configuration panel allows you to see all the channels that are currently configured (patched).
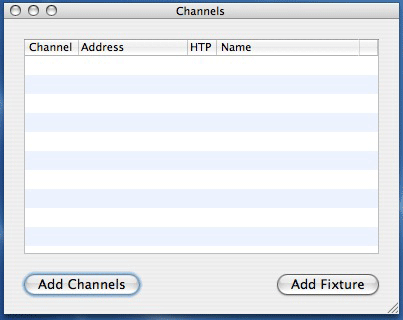 Channel Configuration Panel
Adding a channel
To add one or more generic channels simply click on the Add Channels button on the Channel Configuration Panel. This will open an add channel sheet.
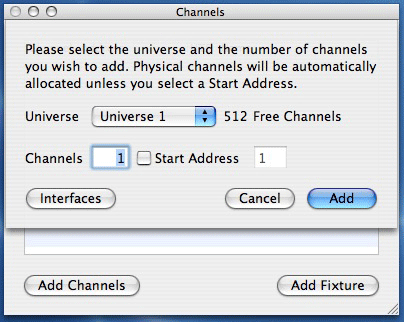 Add Channels Sheet
From this sheet you may select any of the DMX Universes Pressing the Interfaces button, will directly open the Interface to Universe patching preferences. Here you can add additional universes, including dummy ones that can be used to test the application if you don't yet have an interface.
Once you have selected the desired universe you have 2 options for adding channels. You may either :
- Enter the desired number of channels (this must be within the maximum contiguous block of channels available on the interface) in the Channels field and press Add. This will add a consecutive block of channels with the outputs patched to lowest free block of channels on the interface. You may then patch your dimmers to the channels chosen by Chameleon. These channel numbers are displayed on the Channel Configuration Panel.
- Tick the Start Address check box and then enter the start address that your dimmers are currently set to. Then enter the number of channels you wish to patch in the Channels field. If the number of channels you require is unavailable on the interface the Add button will be disabled. Once you have made your selection press Add.
Tip! If you hover the mouse over the Channels field a popup box will tell you what the maximum number of channels that can be patched with the currently selected start address.
You can add channels in this way as many times as needed (within the limit of your Chameleon license, and the number of free channels on the universes).
All channels are given a channel address. Which is made up from the universe number followed by the physical channel number on the universe, e.g. 2/8 represents physical channel 8 on universe 2.
Adding a fixture
A fixture is different from a generic channel, in that it may have a number of different attributes, such as colour, or gobo. A fixture is still represented in chameleon as taking up only 1 channel.
To add one, or more of the same type of, fixtures simply click on the Add Fixture button on the Channel Configuration Panel. This will open an add fixture sheet.
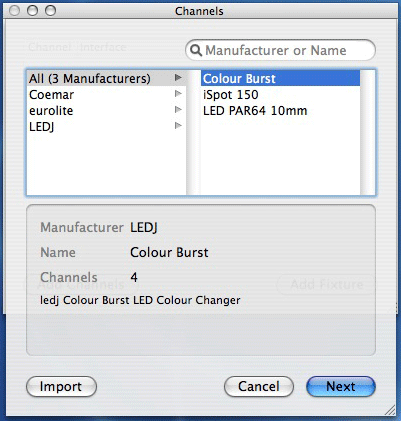 Add Fixture Sheet
From this sheet you select the fixture you wish to add. Selecting a manufacturer from the left hand list will display all their fixtures in the right hand list. Selecting a fixture will display a small summary of the fixture at the bottom of the sheet. If this is the correct fixture you wish to add simple press the Next button.
You can also search for a fixture, or manufacturer, by entering a name in the search field (top right). As soon as you start to enter a name the manufacturers and fixtures will be narrowed down. On the left hand side any manufacturers that match the search text will be displayed. Selecting one of them will show all their fixtures on the right hand side. The All Manufacturers entry on the left contains just those fixtures whose name matches the search text.
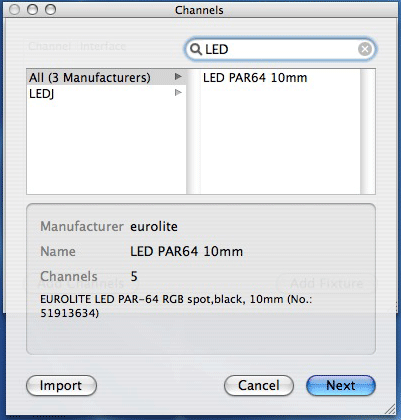 Searching for a fixture
Once you click the Next button the fixture patch sheet will be displayed. You will still be able to see the number of physical channels and the description of the fixture from the Add Fixture Sheet.
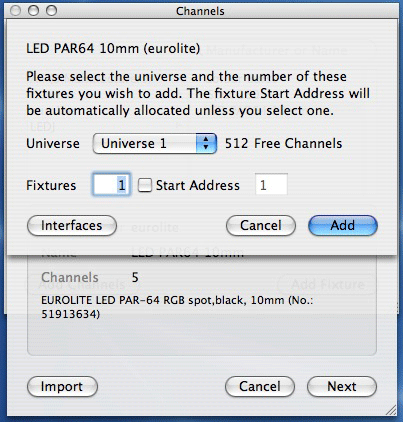 Fixture Patch Sheet
From this sheet you may select any of the DMX Universes Pressing the Interfaces button, will directly open the Interface to Universe patching preferences. Here you can add additional universes, including dummy ones that can be used to test the application if you don't yet have an interface.
Once you have selected the desired output interface you have 2 options for adding the fixture. You may either :
- Enter the desired number of fixtures (this must be within the maximum contiguous block of fixtures available on the interface) in the Fixtures field and press Add. This will add a consecutive block of fixtures with the outputs patched to lowest free block of channels on the interface. You may then patch your fixtures to the channels chosen by Chameleon. These channel numbers are displayed on the Channel Configuration Panel.
- Tick the Start Address check box and then enter the start address that your fixtures are currently set to. Then enter the number of fixtures you wish to patch in the Fixtures field. If the number of fixtures you require is unavailable on the interface the Add button will be disabled. Once you have made your selection press Add.
Tip! If you hover the mouse over the Fixtures field a popup box will tell you what the maximum number of fixtures that can be patched with the currently selected start address.
You can add fixtures in this way as many times as needed (within the limit of your Chameleon license, and the number of free channels on the universes).
Once the fixture is patched you can see the physical channel numbers it uses from the Channel Configuration Panel.
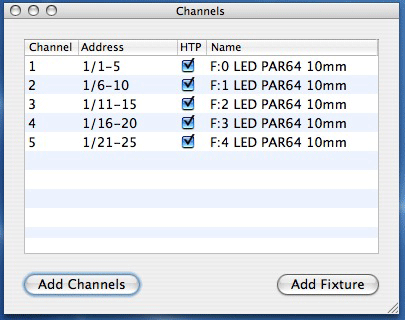 Channel Configuration Panel
After the universe number the first and last physical channel numbers used by the fixture are displayed. You should configure your fixture to use the first physical channel number displayed.
The channel is automatically named with the fixture number and name.
Naming Channels
In order to help you identify channels more easily than a number, you may give them a name e.g. Stage Right Front White. To do this simple double click in the channels name field in the Channel Configuration Panel.
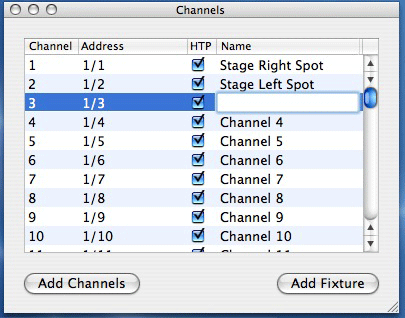 Changing a channel name
Once you have entered the name simply click elsewhere to end editing, or press enter to start editing the next channels name.
Setting a channel as LTP
By default all newly added channels are set as HTP (Highest Takes Precedence). If you wish to change the channel to an LTP (Latest Takes Precedence) channel, simply un-tick the HTP checkbox for the channel.
When the channel is a fixture this setting only affects the intensity attribute of the fixture, all other attributes are automatically defined as LTP.
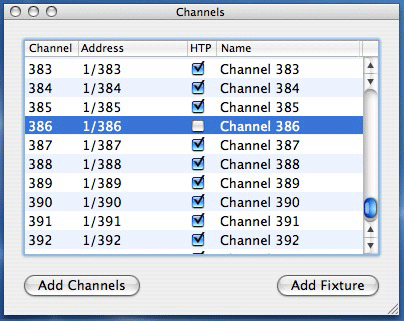 Setting a channel as LTP
 < Record Mode | Contents | Command Line >