Step 4 - Fitting the IC Sockets
Mount the IC sockets next, this will take the most time because of the number of pins you need to solder. Make sure you are careful not to bridge any tracks as they are very close together in places. Don't use to much solder (but make sure you don't have any dry joints), and keep the tip of your iron clean.
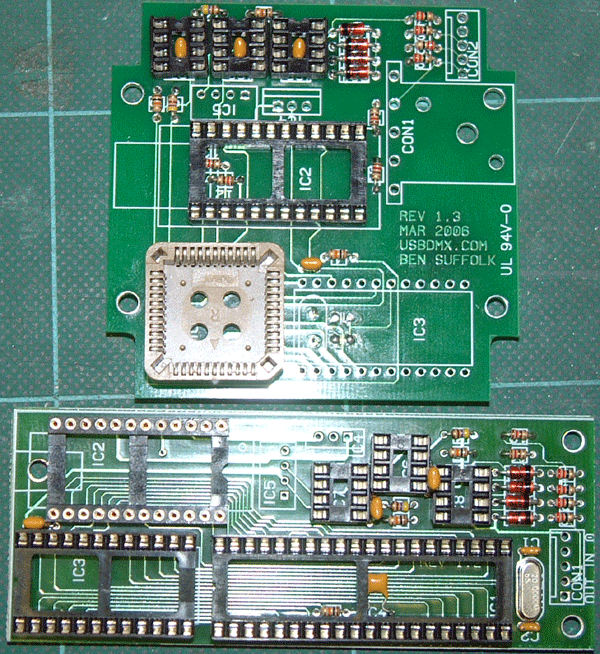
If you are building the 1.3 PCB and are going to use the suggested box, then you must not fit a socket for IC3.

|
|
PCB with IC sockets fitted.
|
|
Its important that you use a turned pin style IC socket for the USB interace on the 1.2 PCB or you are not using the suggested box for the 1.3 PCB. If you don't the force of inserting and removing the USB plug will pull the interface out of the socket, almost certanly bending the pins.
Fitting C6 past the sockets on the 1.2 PCB will be tricky if you don't place it through the holes before soldering IC4 and IC5 sockets into place. You can then position the height of C6 correctly and solder it into place. Alternativly you could mount this under the PCB, in which case you would need to do it before you fit the IC sockets.