Step 8 - Programming
The final part in building the PCB is to program the microprocessor and the USB interface. If you ordered your parts from me then both these steps have already been done for you.
The microprocessor comes completely blank (unless ordered though me) so you need to program the bootlaoder onto it. This is a small bit of firmware that runs when the microprocessor is first powered up. It enables the Firmware Updater application to flash the USB DMX interface firmware onto the microprocessor. The bootloader microchip hex file is available from the Software section. You will need to program the microprocessor before you fit it into the socket.
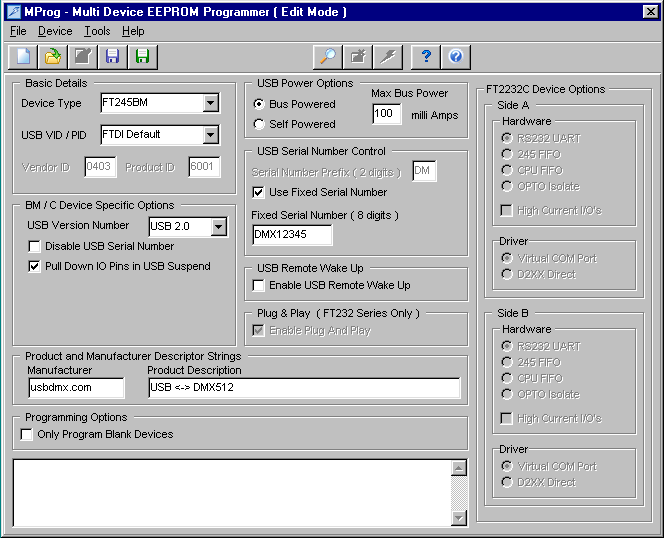
The DLP-USB245M-G USB interface also needs to be configured. This is done with an application called mprog. Its available from the FTDI chip website. Unfortunately this application is only available for Windows machines.

|
|
Programming the USB Interface with mprog
|
|
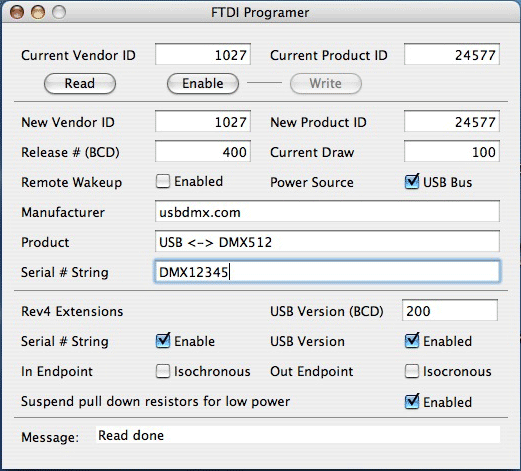
I have also found an application provided by Bits Ltd to program the interface on OSX. You can download it from http://www.bitsltd.net/smartstrip/links.htm> Its called Programmer.app

|
|
Programming the USB Interface with Programmer.app
|
|
You can see all the settings you need to make from the screen shots. The key thing is Fixed Serial Number, it must start with DMX, the next 5 characters are upto you, but they should be unique if you intend to use more than once device. The serial number is used as part of the device name (probably not on a PC) and the Firmware Updater and other software uses this prefix to locate the USB DMX interface, so if you fail to program it the device will not be recognised.
The other important configuration option is to select Bus Powered, and 100 milli Amps.